Showing posts with label kitchen. Show all posts

Friday, 20 September 2013

Molly's Magic in the kitchen


Kitchens are magical places. 

In my kitchen I turn milk into cheese and yoghurt, flour into bread and pasta and water from the tap into tea, coffee or soup. 

My kitchen is where the veggies grown in my garden become yummy meals or are preserved for another time of the year. 

Curds and whey.... from milk, I make cheese
Delicious sweet treats, gifts made with love, soap, cleaning products, herbal remedies, beer and cider are all made from basic ingredients in my kitchen. 

Even before I cooked everything from scratch, my kitchen made a mean vegemite on toast and a cup of tea. 


Tortillas + kids = crazy gnomes in a family kitchen.
But the magic doesn't stop there, kitchens are also places where family magic happens. It's the place we come together around the table and plan, console, laugh, cry and grow as a family. When we first moved here, my kitchen was the home of two high chairs, where our baby boys would eat (throw, mash) their first tastes of a range of foods. I've stood in our kitchen and chatted to countless friends and family members and have wonderful memories of them all. And these days, since our kitchen renovation, my kitchen is filled with so much of us - benches, cupboards, curtains, rugs and shelves that we made with our own hands. 


Delicious food and warm memories are made in our kitchen
Everything about our kitchen is magic, and now, our magic kitchen has a cauldron. A vessel that I throw ingredients into (following instructions in a book or making it up as I go) and, like magic, they turn into terrific meals!  I feel like Mrs Weasley as I walk away to deal with animals/kids/a husband who had a bad day at work while my thermomix chops, sautés and stirs my food.  It's still cooking from scratch, but with so much more power!  


Molly has settled in very nicely....
I've had the thermomix for less than a week, and already I've used it for so much, making at least two recipes (or part recipes) in it each day. Many of them I could make without the thermomix, but some that I couldn't - freshly milled flour from whole wheat or rice, icing sugar and mayonnaise (I know, lots of people make mayo without a thermomix, but I've tried about 6 times and failed). But everything is easier with it. 

The first meal I cooked using the thermomix - Delicious, slightly spiced lentil burgers served in fresh bread rolls made with 50% freshly ground soaked/sprouted wheat with fresh salad from the garden - YUM!

So as a tribute to the magic of kitchens, and that brilliant mother and witch, Mrs Weasley, I'm naming my little magic cauldron, Molly.
Molly Weasley - a bit of magic in the kitchen!
 

Thursday, 7 March 2013

Winnings and gifted things...

The little one is back at school today.  All is feeling much more "as it should be".  Thank you to those of you who sent kind, understanding comments and emails - you made me smile. 
Now, back to some of those posts I started writing last week!
~~~

I won a competition last week! I'm so excited. I've won a few things over the years:
  • A selection of dolls clothes (that my mum had made and donated to the raffle) that I had longed for and loved
  • A hamper of handmade produce from a raffle at our (now) primary school fete the day after we moved to our lovely community.
  • A huge hamper of groceries won in a raffle that I didn't even know I had a ticket in!
There have been a few more, these are my favourites.

But this week's win is exciting because it wasn't random, it was chosen. I entered this photo in a Facebook competition for Back Yard Farmer magazine, and was selected as the lucky winner of 10 issues (the entire back catalogue) of the magazine.

I can't wait to receive them and get all that new information and inspiration in my hot little hands. They arrived early this week and I've loved having them around to browse through.  They're a terrific collection of real stories written by other people, and I'm gleaning lots of little titbits of information and inspiration from them. And that beautiful nectarine tree, which I already love, is now even more special to me :)

I have also been lucky enough to be gifted some wonderful, useful things this week. Continuing with the bartering in exchange for tutoring her daughter, I was given this pressure cooker and some mason jars by one friend. I'm a little scared to use it, but will do lots and lots of reading and it will then be useful for preserving some things that shouldn't be water bathed.

I was also given 54 Vacola jars of varying sizes! Yes, 54! These belonged to a lady who I believe has just moved from her farm to a town home and no longer used them. She offered them to one of my other friends' mum, who didn't want them, but thought of me. I love the wide mouths of the jars, and all the different sizes, and they will work brilliantly with my funky, retro Fowlers Vacola preserver. Not sure I'll get them all filled this year (though I'm trying - pears, apples and dried apples in them so far), but there's always next year! Very grateful to the kind stranger who sent them my way.

Have you won or been gifted anything wonderful lately?

Tuesday, 18 December 2012

Ginger (or chocolate) bread houses (or sleighs)

Last year's mini houses.

One of the things I love about Christmas in our home is that we adopt traditions from all over the world and make Christmas all about us and what we like.  One of those adopted traditions is the gingerbread house.  Back when my kids were very little and my younger brother and sister were small too, I would have the four kids during the holidays.  It was at this time that my then neighbour gave me my first gingerbread house kit.  We had a ball!  I stuck the house together and the four kids attached a huge amount of lollies to it (and rather a lot in their mouths).  We left it on display and then after Christmas, I let them all dig in and eat it.  One of the best things about gingerbread houses is how pretty they look even if you let the kids do it all without any adult views to symmetry and clever decorating.
Our first gingerbread house was a kit version with people etc.

We've made a gingerbread house each year since then, and last year, I made my own gingerbread for the project.  Can I just say - the kits are great, but gingerbread is easy to make and you can cut it however you like and it tastes awesome when you make it yourself!  Last year we made a collection of small houses, some to give as gifts and some to keep for the kids.  They make lovely gifts, but the only downside is that I have friends who don't like ginger.  So this year, we have made some changes to the recipe and have ginger and chocolate bread houses to give away and a sleigh with reindeer that we will put together next week. 

I thought I'd share the recipes and template ideas with you.  I made a batch of each this year and had enough dough to make four of the small houses, 2 reindeer, a sleigh and a large pile of tree and gingerbread man shaped biscuits.

Gingerbread

125g butter
1/2 cup tightly packed brown sugar
1 egg
3 tablespoons golden syrup
2 teaspoons cinnamon
2 teaspoons of ginger
3/4 teaspoon of bicarb soda
2 1/2 cups plain flour

"Chocolate bread"

125g butter
1/2 cup tightly packed brown sugar
1 egg
1 teaspoon vanilla extract
4 heaped teaspoons cocoa
3/4 teaspoon of bicarb soda
2 cups plain flour

Directions for both types

With an electric beater, cream the softened butter and sugar until light and fluffy.  Add the egg and beat well.  Add the other wet ingredient and beat well.  In a separate bowl, sift the dry ingredients and mix well.  Add the dry ingredients to the wet and stir, and then knead with your hands.  The dough will be relatively crumbly.  Form the dough into 3 mounds.  Roll out (with flour/baking paper/your choice of rolling out method) one mound to about 4-5mm thick.  Use your templates to cut out shapes with a knife and then carefully lift the shapes onto a lined baking tray with an egg slice.  Continue rolling out and cutting shapes until all dough is used.  Bake at 180C for 10-15min until just starting to change colour.  Cool on trays for a few minutes and then transfer to cooling racks to cool completely.
Decorating requires tongue sticking out levels of concentration!

Templates

Use cardboard from a cereal box to draw up your templates.  You can then cut them out, lay them on top of the rolled out dough (printed side of the box down) and use a knife to carefully cut around the shapes.  The templates can then be gently wiped clean and put away for next year. 

To make the mini houses you will need:
2 side walls 5cm x 8cm
2 end walls 5cm square with a 3cm tall triangle on top
2 roof pieces 5cm x 9cm
One of this years complete mini houses.

To make the sleigh, you will need:
2 sleigh side shapes
1 big square for the back
1 smaller square for the front
2 (or more) reindeer/horse shapes
Enlarge this image to fit on an A4 sheet and you should be able to use my templates, or feel free to make your own better ones ;)

This image is of my templates.  The bigger square is 8cmx8cm.  Feel free to copy the image and scale in your own program.

To assemble


Make up a batch of royal icing by gently beating an egg white and then beating in about 1 1/2 cups of icing sugar (I use the mixture, not pure) and a teaspoon of lemon juice.  Spoon into a piping bag (or snap lock back with a corner cut off).

Use the chocolate shapes, ginger shapes or a combination of both depending on your (or your gift recipients) tastes.
A chocolate house assembled and ready for decorating.

For the houses, I assemble on a foil covered coaster.  Run a line of the icing along the front of the coaster and down each side where the walls will stand (test the spacing with your pieces first).  On on of the end wall, pipe a line of icing up the back of the wall edges and place the piece onto the line of piping on the coaster.  Quickly glue the two wall pieces into place to hold it up, then attach the back wall.  Use more icing to attach the two roof pieces and fill in the gap in the top with more icing.  Your icing doesn't need to be neat, you won't notice it when you finish the decorating!

I like to give my house a couple of minutes for the 'concrete' to dry, and then go to town with the lollies!  Use whatever you like in terms of lollies, but we particularly like smarties, mini marshmallows and candy canes and tiny teddy biscuits make nice residents :).  Last year we used small chocolate bars cut on an angle to make chimneys and some fruit/musk sticks, and this year we used some licorice allsorts.  Use your imagination and have fun.
Lots of bright lollies make pretty houses.

To make the sleigh, I will join the four pieces and then stand the horse shapes at the front.  They will have pretzel antlers added and I have lots of decorating ideas.  I'll share a picture when its done.


Have fun!

Monday, 13 August 2012

The goodness of cooking from scratch

I love cooking from scratch, but occasionally, it starts to feel like a chore and the lure of packets of ready mades in the shops is hard to resist.

Tonight though, I remember why we cook from scratch.  It is cheaper, feels more satisfying, and the taste.... Oh the taste.

Tonight was a practise run for tomorrow's kitchen garden program at school. A "made up by me" recipe - pumpkin and bean burritos.  They were sooooo good.  We used a chunk of grated pumpkin cooked with azuki beans (I had them instead of kidney beans and their small size was perfect) and taco seasoning.  We served in homemade tortillas with salad, cheese, sour cream and salsa.  I'm sure they'll be good at school, but our homemade tortillas made them amazing!  I'll put the recipe below.

Then for dessert, I fancied chocolate topping on my ice-cream.  We don't have any, but a quick Google search found this recipe.  Was it good? Put it this way, I will never buy chocolate sauce again.
Picture with recipe here.

Sorry, no photos of our food, we scoffled it all down too quickly.

Soft flour tortillas
  1. Mix together 2 cups of plain flour with 1 1/2 tsp baking powder, 1/2 tsp salt and 2 tsp oil
  2. Add 3/4 cup warm milk and mix to a sticky dough.
  3. Kneading dough on a floured bench for 2 minutes.
  4. Place in a covered bowl to rest for 20min.
  5. Remove and divide into 8 pieces.
  6. Roll each piece into a ball and place onto a plate, not touching.  Cover and stand an extra 20 min.
  7. Roll out the balls on a floured bench to about 20cm diameter.
  8. Cook in a hot, dry frying pan until they puff slightly, flip and cook other side (about 30 sec each).
  9. Eat warm or cover with a damp cloth to use a bit later.

Wednesday, 1 August 2012

Rustic homemade spinach pasta

I've had a pasta maker for a few years now and I love it!  I love it so much that a few months ago I stopped buying pasta.  We used to always have a couple of varieties of dried pasta in the cupboard, but that is all but used up and we are homemade all the way.  A basic egg pasta (my original recipe is Jamie Oliver's) is easy to make and very cheap if you have fresh eggs from your own chooks.  It tastes better than any pasta I've ever bought, fresh or dried, and is Oh-so-satisfying to put on the table.  Making all of my own pasta makes a dinner of pasta and sauce a little less convenient, but that's OK, we manage.

 
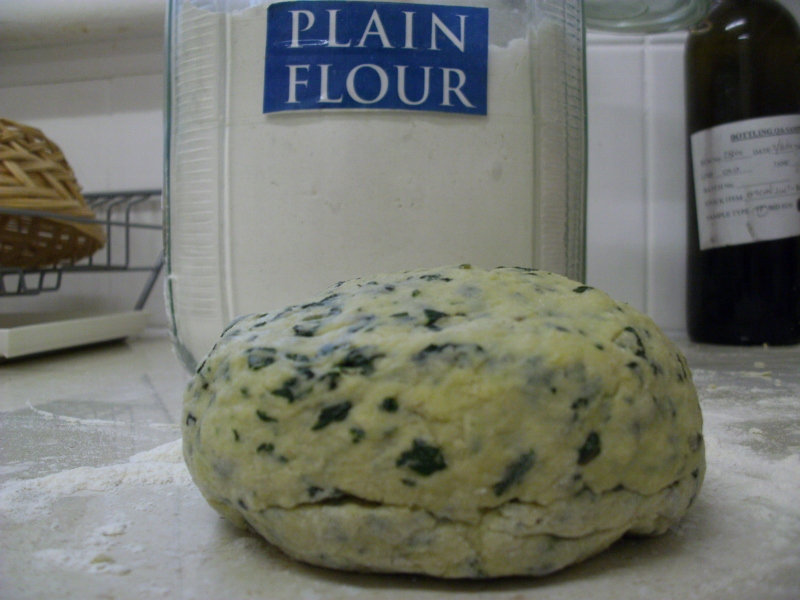
Yesterday, I made spinach (silverbeet) fettucini to serve with some organic meatballs and a basic pasta sauce.  It was yummo!  Adding some greens to your pasta makes the pasta look really cool and also adds that extra veg to your dinner without it being an issue for the kids.  Its also a great way to use an abundance of greens from your garden, or in this case, from my mum's garden (we seem to have only grown dark purple silverbeet this year - great if we wanted pink pasta, but it doesn't look so nice with a tomato sauce).  I call mine 'rustic' because I don't puree the silverbeet, just cook it and chop it finely.  This makes the pasta spotty, and also a little harder to cut with the machine, but it tastes great and still works.


Note:  The following recipe makes enough for 2 big adult serves or enough for 2 adults + 2 (small eater) kids with a hearty sauce - I usually go with about 100g flour per adult serve if serving with a light sauce, less if you are serving a hearty meat based sauce.


What you need:

  • 2 big silverbeet leaves (or the equivelent of spinach or other greens - try rocket, basil........)
  • 1 large egg (if you make this without the greens, use 1 regular egg per 100g flour)
  • 200g plain flour (use 00 flour if you like, but this works fine)
  • extra flour
  • some cold water


How to do it:

  • Remove all of the stems from your silverbeet and then cook it in some boiling water.  Drain and chop the silverbeet finely (or puree in the food processor if you want less spotty/rustic pasta). 
  • Weigh your flour and put it in a pile on your (clean) bench top.  With a spoon or your hand, spread the flour out to make a large bowl/well in the centre.
  • Add your chopped silverbeet to the well and crack in your egg.
  • Use your spoon to mix the wet ingredients into the flour, bringing in the flour from the bowl gradually.  Once your ingredients have started to come together, ditch the spoon and use your hands to bring it all together.  Depending on how wet your silverbeet was and how big your egg was, you will need to add some cold water.  Add it slowly, kneading the dough as you go.
  • Once it all forms a dough, knead it until it is nice and smooth (and spotty!).  Pop your dough in the fridge (covered with a damp serviette or, if you must, plastic wrap) for at least 1/2 an hour or until 1/2 an hour to an hour before you want to eat.

  • I don't like to dry my pasta, so I make it fresh and then chuck it straight in the pot, but you can dry your pasta to use later by hanging the strands over a rack (or any clean stick hanging in your kitchen).  Just be sure to dust it with plenty of flour or it will stick to the rack.
  • Because I use my pasta straight away, I prepare the sauce in advance and have it simmering away ready to go as soon as the pasta is cooked.
  • Back to the pasta. 
  • So, take your dough out of the fridge.  Cut it in half and roll out flat.  With your pasta maker set on the widest setting (1), you need to laminate the pasta.  Roll it with the machine, fold it in half and then roll again.  I fold and roll, fold and roll about 6 times.  You'll know it is ready because the pasta become nice and silky smooth.
  • Then you gradually roll the pasta thinner.  For fettucine, I like to go up to the 6 or 7 setting on my pasta machine (go thinner for ravioli etc).

  • You will find that your pieces will get rather long as your roll them out.  Just cut them in half as needed.  I'm not concerned if my pasta is variable in length, so I don't worry about exact lengths.
  • Once the pasta is all rolled, attach your cutter to the machine and switch the crank handle across.  Dust your pasta well with some more flour before you cut it to stop it all sticking together as it comes through.  Feed the dough through the cutter and voila!  Fettucini (or spaghetti if you used the thin cutter).

  • I pile my cut pasta all over the place then while my lightly salted water comes to the boil.  Once your water is at a rolling boil, add your pasta and give it a stir.  It will swell slightly and rise to the top when it is cooked (about 2 minutes).  Be careful not to overcook your pasta or it will feel waterlogged and a bit gluggy.

  • Drain and serve with your sauce and some parmeson cheese.  Feel free to look smug while serving it and gloat a little while you eat ;)
    A note about pasta machines: If you don't have a pasta machine, you can hand roll and cut it. Have fun with that. I've done it before and the pasta tastes great, but its hard work and it never looks great.  I have a cheap pasta maker.  After a few years of relatively regular use, it is starting to fall apart a bit.  Nothing un-fixable, but I've just picked up a replacement for when it really dies.  Mine cost $10 from Kmart I think, and there are often some at Aldi or other discount shops.  By all means, spend more if you like.  As to the electric ones, I really don't see the point for home pasta makers.  The winding of the crank is soothing and fun (kids love to help too) and I don't think the electric ones or worth the extra dollars for the time you save.  Your choice though!! :)


Friday, 22 June 2012

Guilt free shopping

Welcome Down to Earth-ers!

Hello!  Welcome to everyone popping over from Rhonda's blog!  I love Rhonda's "Weekend reading" posts, so feel very honoured to be a part of one.  I've filled up the tea-pot, so help yourself to a cup and have a look around.  Then come back often - I love visitors! :)

~~~

I have two big bad addictions - chocolate and shopping.  The first is fairly self explanatory, and we won't go into that, but shopping is a problem for someone who chooses to live on a tight budget and in a small home.  Not that I've ever been an extravagant shopper, but I am a sucker for the clearance racks and catalogues full of "bargains".  I'm reminded of this a lot this month as it is Toy Sale month.  Usually, in June, I've been around collecting all of the big shop toy catalogues and am busily browsing them with the kids and then buying "bargains" for birthdays and Christmas (that more often than not are not really wanted in 6 months....).  But not this year..... I have changed my ways!
image from http://theramblingsofamummy.blogspot.com.au/

Back in January, I made myself not buy anything for a month (other than groceries).  I didn't go to the shopping centres or down the street for a browse and I didn't go into opshops (thrift/charity stores) either.  I did really well and at the end of the month had a short list of 3 items that we needed to buy.  I think of all the things I probably would have bought and that I then saved on by not going, and I'm very pleased!

I'm allowed to shop again now, but I've gone right off the regular stores, and instead spend my shopping time (and dollars) in the local opshops.  Mum used to take us opshopping as kids, my best friend and I opshopped as teens, and as a mum of babies, I loved the opshop for toys and baby clothes.  Now I browse the opshop for craft items, household items, books and puzzles for the kids and clothes to wear or for repurposing/upcycling.  I still try to stick to the "needs" and less of the "wants", but at least with opshops, I don't feel so bad.

Opshops are great for so many reasons....

  • By spending there you are usually helping a charity.
  • You spend a very small amount of money to get your shopping fix items for your home
  • You are recycling items that were no longer any use to someone else
  • You never know what you'll find and the items are changing all the time
  • You often find fabulous vintage/retro/antique items for a fraction of the price they are sold elsewhere.
  • And if you buy to much (!) you can always donate the excess back and feel good for just making a financial donation :P

I wanted to share a few of my recently thrifted items with you now.
a sweet (and shiny - sorry) little teapot ($1)
no - not the dogs!  The sheets I used to crochet this rag rug for the kitchen (I used two at $2ea)
(but how cute are the dogs - Buddy and Hurley, they felt the need for some blog stardom)
In this photo you can see my roman blind, made from a vintage opshop sheet ($2), another sweet teapot hanging on the pot rack ($1) and my spice rack on the wall which I bought still in the 1970's box and complete with all the bottles and stickers ($5)
A beautiful and practical cast iron meat grinder ($8)
 
An antique sewing machine table/cupboard ($60).  It also came with a vintage sewing machine (not the original) but it wasn't in working order, so I have taken it out and will pass it on to my brother to "play" with.

There have been many more items lately, some not from opshops, but from vintage shops, garage sales and markets too.  I love buying second hand......

Do you opshop?  I'd love to see some of your favourite opshop purchases.  If you write a blog, perhaps you could write your own post on them (and link back here, I don't know how to do a proper bloggy party yet, but that'll work!)

Thanks so much for visiting! :D

Wednesday, 20 June 2012

Tea in Granny's Garden

I love my tea pot.  It's so plump and sweet looking in its glosssy yellow paint and sweet white daisies.  Stu bought it for me (together with its matching sugar bowl and milk jug) for our first Christmas after we moved in together, so it has been travelling around with us or some time now.  I've just recently starting using it for tea again though - there is nothing like a pot of tea in winter, and I also love filling it with my homemade chai. 


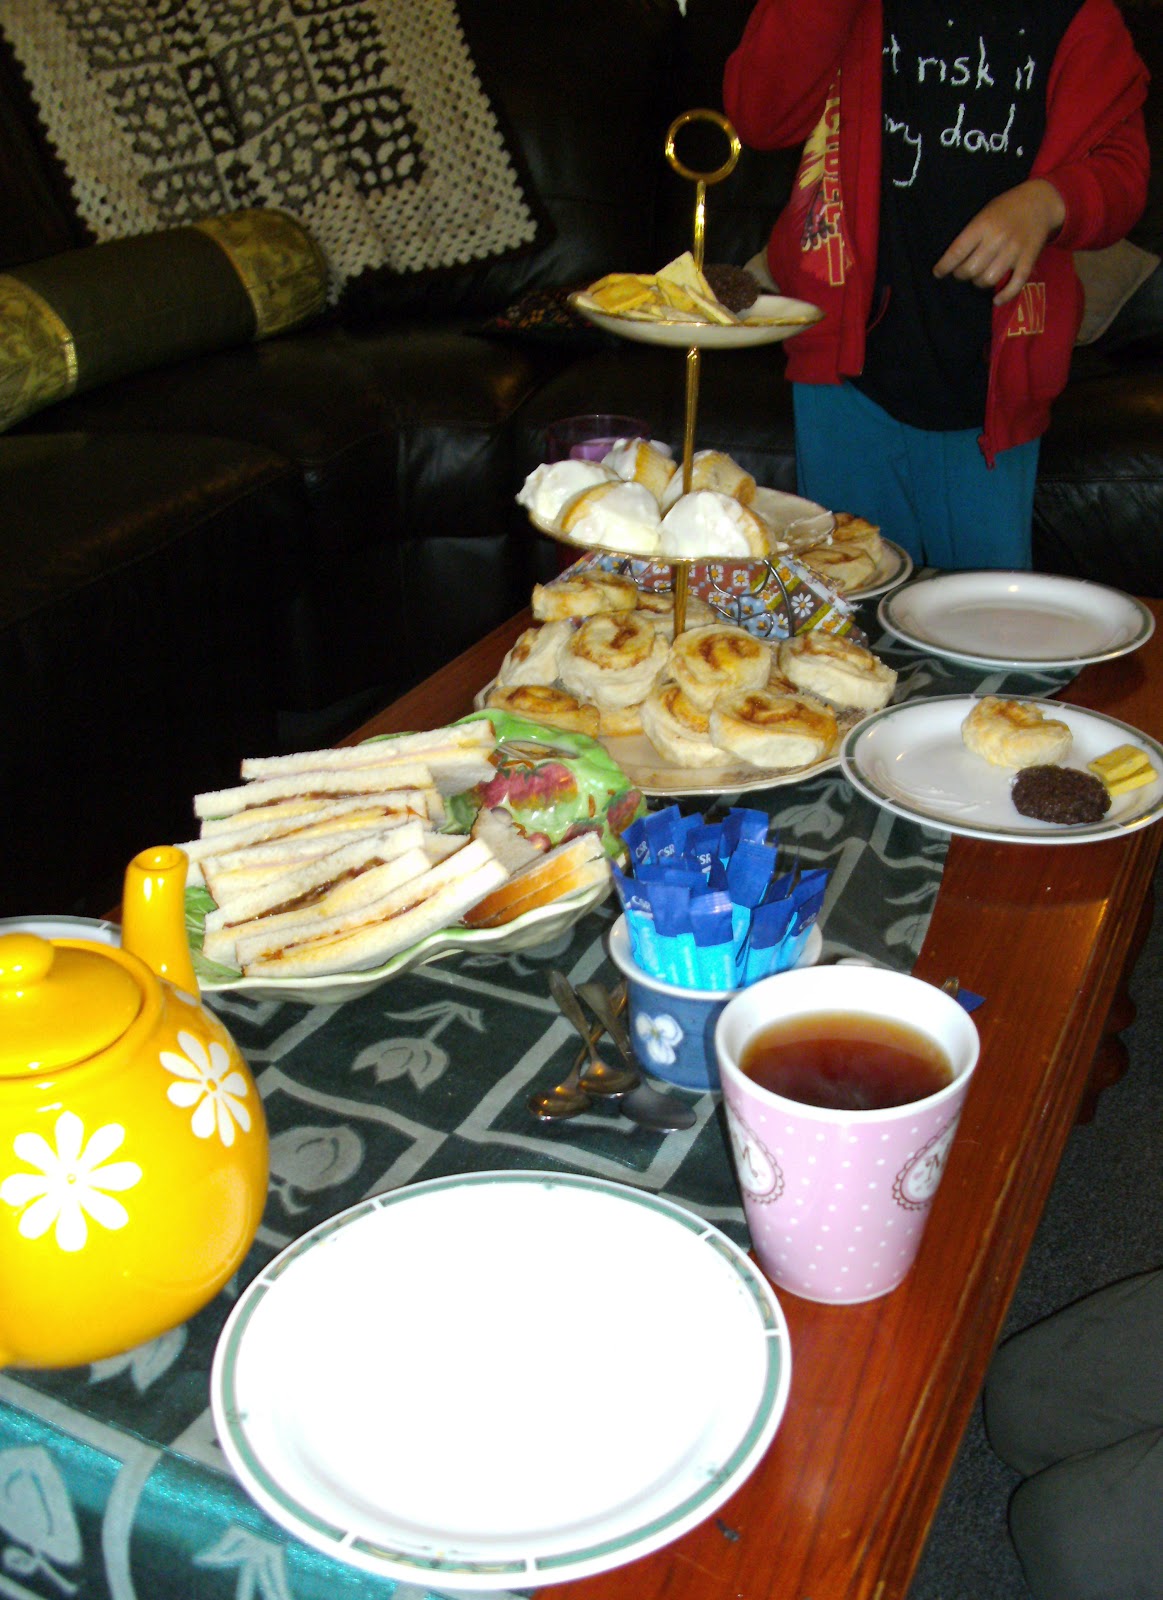
Here's my teapot in action for our "high tea" on the weekend.

But my brews were not staying warm enough, so I needed a tea cosy.  I was going to buy one, but the only ones I could find were blah, so I started hunting for a pattern.  It had to be crochet (cos I'm not a knitter), reasonably easy, use yarn I already had and preferably be pretty too.  I found a pattern for a Granny stripe cosy, and started with some blue yarn I had lying around and made this......
Pretty cute huh?  And perfectly practical..... but I had an idea brewing (hehe - yep, I meant that pun) and the cold windy day today proved to be the perfect time to let my idea bloom (yep, that's another pun....)  And I created this -

Ta-da!!  Tea in Granny's Garden!  I love love love it!  It looks so sweet in my kitchen - like spring arrived early.  And with a bit of luck, it'll keep my tea warm too :)

Sunday, 10 June 2012

A simple rustic sign to make

The kids had the day off school the other day for the teacher strike and I'm not a big fan of days where we don't do something, so I decided to tackle a project that I'd had on my Pinterest board for a while.  It was so quick, easy and rewarding (and free!) that I thought I would share it here - you might be hankering for a sign for your home, a project for the kids or a gift idea and this could be just the thing!

You will need:

  • A piece of timber the size you want your finished sign - we used rustic old boards from a packing box we picked up for free.  You could use old palings or timber from a pallet, or for a sleeker finish, an offcut of dressed pine that you've painted.
  • small nails with a flat head on them (bullet head nails could allow your yarn to slip off)
  • Jute string or some sort of yarn (the boys used coloured leftover yarn)
  • Hammer
  • Grey lead pencil and maybe a ruler and eraser
  • Scissors
  • About 1/2 an hour of free time.

What you do:

  1. Prepare your timber - cut to size or paint as you need.  We were lucky in that our timber was just the size we wanted.
  2. Write your letters/word on the timber with your pencil.  The boys did their initials and I wrote HOME.  You could choose anything you like.  Nice big block letters work well, but use your imagination.
  3. When you are happy with the layout of your word, lay your timber on a sheet of scrap wood or a work bench and start hammering in your nails.  You will need them to be firmly into the timber, but not through the timber, and sticking out about 1.5-2cm.  You need the nails about 2cm apart on the letters, and make sure you put them neatly in each "intersection" of the letters.
  4. Once you have all of your nails in, tie the end of your yarn or string to one of the nails, leaving about 10cm of tail, then weave away!  I made mine so that there were 5-7 layers of the yarn between each set of nails.  It doesn't have to be equal, but you want to build up a decent wall of yarn. 
  5. Finish your weaving back at the starting point.  Cut the yarn and tie it tightly to the tail you left at the start.  Trim the ends.
  6. Now do the same on each of your letters.
  7. We hung ours using 3 strands of yarn as a hanger, but you could leave this out and hang with eye hooks or similar. 
  8. Now hang it on your wall and admire your work each time you walk past! (I hung mine in the kitchen wall that is visible as you walk in the front door, hubby saw it as soon as he came home and loved it.  The kids hung theirs above their beds.)


Monday, 4 June 2012

12 months of greening - June - Chemical Audit

We don't make New Year's resolutions in my family, but this year we decided on a 12 month challenge in which each month we do something to reduce our carbon footprint.  We write the challenge on the calender and we try our hardest that month to complete it.  We've done really well so far and many of the changes have become permanent!  I will post about the last 5 months soon, but as it is now the start of June, I will write about what we're doing right now.

This month's challenge is to do a chemical audit of our home.  This means that I plan to go through the whole house (particularly the kitchen, bathroom, laundry and shed) and identify chemicals that we have.  I'll then clean them up - removing as much as I can and disposing of them at the next safe disposal day in town and replacing with greener alternatives where needed.

The kitchen is already pretty good, I have a basic phosphate free, biodegradable dish detergent and I use Ecostore brand dishwasher powder which I'm really happy with.  I have made my own spray cleaner from vinegar and water for years, but I have just started brewing some citrus cleaners that I found on the lovely Enchanted Moments blog (thanks!!).

The bathroom has begun too - I cleaned out the old petro-chemical based moisturiser and replaced it with a Sorbolene that is entirely plant based and not tested on animals, and will be endeavouring to use this instead of a face cleanser too.  I need to make a homemade toner next.  I tried washing my face with soap and water only, which works on normal days, but when I've been at work and needed a feel face of makeup, I need a good cleanse/tone/mousturise routine.  A few months ago I also started making our own soap (using Rhonda's soap recipe at Down to Earth) which I love and went "no-poo" (ie. washing my hair with diluted bicarb and a vinegar rinse).  The kids just use some of our soap to wash, but Stu seems to need shampoo, so I'll be looking for a good eco-friendly one for him.  I then have a few hair producrs to clean out - most of which we never use anyway!


In the laundry, I started making my own laundry powder from this recipe and it works great.  I have a collection of bicarb and vinegar for cleaning and with a bit of elbow grease they seem to tackle just about everything.  But there are some other icky things in there that need the heave-ho! :)

And the shed..... we did a bit of a clean out when we tidied up in there recently, but I know this is going to be a big job - pehaps we'll tackle it next weekend.

Do you use green cleaners and alternatives?  what are your favourites?  Are there any yucky chemicals that you have decided you just can't live without?

Monday, 28 May 2012

Finished!

How good does a finished project feel?  In the first week of Autumn we started to pull out our old kitchen cabinets and now, in the final week of Autumn, we have put in the final piece of our "new" kitchen!


This bookshelf (made from scratch using mostly offcuts) sits in next to our oven, right behind my seat at the island bench.  It has ample room for my cookbooks, gardening books and the pile of scribbled and ripped from magazine recipes and is in just the right spot for moments taken with a cuppa to browse the books.  It also give valuable space next to the stove to put things.

I'm so proud of our kitchen.  Not only does it look and feel fabulous, but we made it!  We did nearly everything ourselves and were able to do it on a minimal budget and include a lot of recycled items in the design.

We also did it all in our designated time, actually finished it and barely argued all the way through the project! :)  I can genuinely say I loved working as a family on this project and the finished room truly feels like it is ours and is so peaceful and warm.

Now onto the next project......