Showing posts with label Learning. Show all posts

Sunday, 28 April 2013

Not a butcher

Remember these guys?

Well they grew up. They grew up into beautiful big roosters of various colours. They were quite friendly and lived peacefully in a bachelor coop with younger roosters that have gradually come to join them. I enjoyed raising them, but as was always the intention, the time came for them to be processed into healthy, lean, almost free range and extremely low food miles meat for our freezer.

We've processed a few batches now, and we're getting better at it.  Each time, we learn something new and do the job cleaner, quicker and with less waste.

The adjustments we made to the process this time were to put each of the roosters (three this time - two of ours and a donated Rhode Island Red), into an empty feed bag each when we caught them. Previously we've just put them all into a box and once we had one escape and had to chase him round the backyard - not conducive to stress free meat! By placing them in the dark bags, they stayed still and calm until their turn came. We only ever catch then when we are completely ready, so they are in the bags a maximum of 10 minutes.

The other change was to add a few drops of dish detergent to the scalding water we use before plucking. I don't know if it helped - the first two were relatively easy to pluck, but the third one wasn't. I think the water was too cold, but basically, he ended up skinned instead of plucked. This seemed like a bad thing, but ended up good.

Now I'm not a butcher, and I actually don't like handling meat, but I believe humans should be omnivores, I believe we should eat humanely raised and killed meat and I am the only one in our house likely to do any butchering.  So I set to preparing our roosters for the freezer. Previously, I've just cleaned them all up and frozen them whole. And previously, we've fed the necks to the dog, but all the feathers, guts etc have been thrown out. Not this time. This time, we reserved the necks for Buddy, I have frozen the livers in a container to become pâté when we have enough (I'll add more each time we do this) and the guts and feathers were buried near one of our fruit trees to act as a blood and bone fertiliser.

The rest of the chicken, I brought inside. The Rhode Island Red was plump and lovely looking, so after a clean, he was left in tact to become a roast. The other two were not so 'roast chicken' looking, so I had a go at jointing them. I can't say I ended up with the neatest cuts of meat, but I did put a bag of skinless/boneless breast fillets, a bag of skinless/boneless thigh fillets and a bag of legs and wings into the freezer. Then, not wanting to waste anything, the carcasses went into the crock cooker with a couple of litres of water for two days. Yesterday, I strained it, picked the remaining meat from the bones and gave the bones to the chooks to pick at (that made me feel weird, but I didn't want to just throw them out! Besides, they do eat meat scraps from the chook bucket usually....).

The scraps of meat were added to a pasta dish last night, and the stock filled three large mason jars, which I bravely pressure cooked using my pressure canner for the first time. I was petrified of using it, but in the end, it wasn't too hard, and I now have three meals worth of stock added to my overflowing pantry.

So, despite the fact that I'm not a butcher, I managed to grow healthy, happy roosters and turn those three roosters into at least 10 meals for our family, plus bones for the dog and pâté. And not one bit of those roosters went to waste, or left the property.

Happy mini farmers.

Thursday, 28 March 2013

Home remedies - ear infections

Remember how I said that the boys cold had left me alone? I think I jinxed myself, and in typical me fashion, have ended up with an ear infection and have been feeling pretty lousy.

I have always had dodgy ears. I suffered badly with ear infections as a child and spent a lot of time taking antibiotics and other things to clear them up. I ended up having my tonsils and adenoids removed, having a surgical nasal scrape and having grommets put in my ears. The surgery helped and I was able to get through my teens without another ear infection (just dreaded cold sores which are my other personal problem and I'll tackle in a later post).

But in my 20s, my ears starting to play up again and by my 30s, I was having at least one ear infection a year, every cold was heralded by sore ears and I even had the joy of a ruptured ear drum a few years back.

The trouble is, the last two years, I've been to the doctors with shocking earaches (pain killers don't touch them) and the GPs have told me 'you've got too much fluid and wax buildup, I can't see anything in there' and prescribed 'waxol' (ear drops that supposedly dissolve the ear wax). So, knowing that my ears were actually infected, I would simply live through it, allowing my body to fix itself which was slow and painful. BTW, the waxol did absolutely nothing - it was uncomfortable and didn't clear my ears at all.

After the third unsuccessful visit to a doctor about this, I decided to stop and to take a more natural, home remedy approach.

Just an aside here, as I'm sure some of you are saying 'see a naturopath' (or similar). I grew up only seeing doctors, and never saw alternative therapists. I've since seen a chiro twice, but have never tried anything else. I might one day, but honestly I hate seeing anyone, and other than my biennial 'girl' health check and this ear infection business, I don't even see doctors.

So I've done a lot of research and the number of home remedies for ear infections is huge! People use all sorts of things - coconut oil, garlic infused oil, onion wedges, basil oil and their own urine to name but a few. I could try any of them (maybe not the urine), but found one that sat well with me and decided to stick with it for this infection and see how it goes. This is what I do:
Lovely lavender... {image}

Warm a teaspoon of olive oil and add to it three drops of tea tree oil and two drops of lavender oil. I soak this up on a cotton bud and place it into my outer ear. I've been doing this for an hour at a time, three (of more) times a day.

The best thing about this treatment is that all the ingredients are simple things that I trust and are always in my cupboards anyway. There is also very little chance of doing any harm with this treatment, so if it doesn't work, I'm no worse off and I still have the option of seeking medical help.

So how's it working? Well, firstly, the warmth of the olive oil soothes the ear ache immediately and makes me feel heaps better for the hour it is in. After that, the discomfort is dulled for a few hours (I can tell its time to do it again and the pain starts to flair). After one day, my ear was feeling loads better, after two, the pain was almost non-existent.   I plan to keep this up for a couple more days to ensure all the baddies are gone. It feels like its going to work (I promise a follow up post if it doesn't!).

Once my ears are back to normal, I plan to do more regular ear candling (we started that last year, but not often enough). I'm hoping that through maintenance and home remedies for acute situations, I can care for my ears naturally, without antibiotics and without doctors.

I'm fairly new to this home remedy stuff, but am learning quickly. We're trying a few other things and I'll post on them as we go. Would love to hear your thoughts on this, and any experiences you've had with DIY-ing ear infection treatment.

Tuesday, 1 January 2013

Welcoming in the new year

Happy New Year to you all! Yesterday we farewelled 2012 with a fabulous family fun day. And as we leave 2012 behind, our family leaves behind a massive roller coaster of a year.
Last year's early and fun Christmas celebration with my family - an hour before Stu had a seizure and we were catapulted into the roller coaster that was 2012.

A year during which my husband was diagnosed with epilepsy, and due to his massive seizure last Christmas, was unable to drive for 3 months, causing some pretty tough times for us. But through this, we found out how supportive our community and family is and also, through the scariness of watching my husband have a seizure and be transported off in an ambulance, I realised just how much he means to me.

It was a year when our bank balance started off fairly low, and our main source if income was snatched away by a company closing down all of its rural and regional branches and thus making my husband redundant. But it was also a year when we became more self sufficient, and eco friendly and much less consumerist, resulting in us not only making a massive dent in our 'carbon footprint', but also saving a lot of money. And it was the year that Stu was offered a job by a business contact and was therefore lucky enough to walk from one job, straight into another.

It was a year for watching generations change. We sadly farewelled three grandmothers, and while we and our children felt the loss, we were probably most hit by watching our own parents grieve the loss of their mothers. But as we farewelled those three special women, we welcomed a new special woman into the world. The arrival of our first niece, Clover,was not only a truly amazing time for me as I was invited to share in her birth, but we've loved watching her grow these last few months, and hope to continue to be a special part of her life.

As I listen to my happy, healthy, bright and gentle children play in the next room and look out to my thriving garden and animals surrounding our uniquely special home, I am very grateful for all of the experiences we've had this year - good and bad - as they have shaped our family into what we are today as we head into 2013.

Thursday, 15 November 2012

We built a pizza oven!

One of the things we've been very busy with at our house has been the pizza oven project.  Well it is finished!  Hooray! 
Pouncy thinks he makes a lovely addition to the oven.
It was a great project.  We learnt a lot of new skills and ended up with something that we love to look at and is functional too.  But we're certainly no experts, so I'm not giving a tutorial or anything like that.  But here is our pizza oven story.  Feel free to ask any questions.

Step one was to build the plinth or base for the oven.  We had an existing concrete slab, so we levelled that and built on top.  We used besser blocks for our base.  Can I just say - besser blocks are damn heavy!  And having never laid any bricks before, this was a steep learning curve for us.  But despite our lack of experience and the damn rain, it got done and we were even able to make a fancy arch at the front using recycled bricks and pieces of bluestone that were found on our block (they were from the original school building that used to be here).  It was so exciting when we pulled out the form work and the arch stayed in place.  A thing of true beauty that we just kept gazing at.  Oh, and we tested the safety of it by letting Hurley walk under it ;)

We then had to make a top for the plinth.  We used a piece of cement sheet, held up up with more besser blocks underneath.  We laid a surround of recycled bricks, held them together with some wood and trailer ties (true professionals I tell you!) and then poured a 5cm thick re-inforced concrete slab on top.  Onto this, we smashed a pile of bottles and lay the broken glass and then filled up with sand.  This is supposed to help with insulation.  Onto the sand we added a layer of clay pavers.  Then we tested the safety of this by standing our children on the top hehehe.

 
The next step was so exciting as we were actually building the oven, several weeks after starting!  We made a guide for building the dome, then I built another arch for the door.  The rain kept coming and the tarp was well used.  Finally, Stu built a great big sandcastle, I mean sand dome mold, and the kids played in the sand pile. 

 And then we built the oven.  We used about 60 recycled bricks that had been broken in half.  Just an aside here, the work involved in removing mortar from reclaimed bricks and then breaking them in half is back breaking and really rather unpleasant.  The bricks built up quite quickly, with this step and the next being completed in a day.  We put in our stainless steel flue at this point too, nestling the bricks tightly around it to hold it in place.

To finish off the oven, we used a layer of insulation batts and covered them with a mud mix that we'd put rather a lot of oxide into.  It looked rather too much like chocolate cake mix and I spent the whole time we were doing this bit singing the Crowded House song about chocolate cake (very annoying!).  We ended up using two barrow loads of this mud/concrete mix to get a good coverage.

 Finally, we were done!  We left it for a few days for the mortar to dry and then the only thing left was to pull out the sand.  The kids had a great time doing this and it was lovely to reveal the inside of the oven.  We christened it with a small fire and a curry cooked in it.  It was delicious!

And then, finally, we cooked pizzas in it for the boys birthday party.  Stu is master pizza oven man, and did a great job.  But we discovered we needed to burn a bigger, hotter fire, for longer before we try these again.  Probably also wasn't a great idea to try cooking pizzas for the first time with 22 hungry mouths to feed..... oops!  But it was fun anyway and we plied them with home brewed beer and ginger beer while they waited.

All up, it was a fabulously fun project and for about $500 and many, many hours of hard work, we have something pretty special in our garden.

PS. sorry the pics end up a bit tiny - there were just too many to make them big! :)

Thursday, 26 July 2012

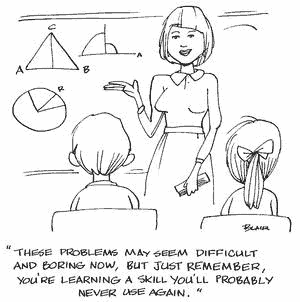
When will I ever need to use Pythagarus theorem??

Ah, the wisdom that comes with age.  The moments where you fondly recall something taught to you by a parent or teacher and realise that it was indeed useful afterall.  I was a good student, but even I occasionally succumbed to the obnoxious teenagers' rant of "When am I ever going to use that?  Aren't you supposed to be teaching life skills?".  It wasn't often, but some things just did not seem worth learning at the time.  My teachers would just smile and tell me to just do the work - infuriating!  I did the work and passed the tests and then promptly forgot the lessons...... or so I thought.


Image from here

Fast Forward 15-20 years from high school, and I've now been on the receiving end of those questions.  As a science teacher, you get them a lot.  But as a maths teacher, you get them even more.  Most students don't question basic arithmetic, money, time, fractions etc, but algebra, Pythagoras theorem, trigonometry, probability and quadratic equations are not only harder to learn, but harder to anticipate ever using outside of the classroom. 

Guess what?  I think I've used them all.  Every single one of those crazy maths things plus the knowledge I picked up in every one of my high school subjects (English, science, geography, woodwork, metal work, cooking, sewing, agriculture, and even my least favourites - history and PE!).  And every time I find another use for one of those things I chuckle to myself and wish I could go back and tell my teachers.
Image from here

So thank you Mr Peck for making me do all of those Pythagoras problems.  I only wish you could have answered my question..... "When will you ever use Pythagoras theorem?  Why you'll use it when you are designing experiments at university in your early 20s; you'll use it when you build a cubby house for your twins in your late 20s; you'll use it again when you are designing a cold frame made of recycled materials in your early 30s; and you'll surely use it countless more times in between and into the future."
My newly made cold frame is made of recycled pallets and window and will be used to grow my own seedlings this summer.  I will think of all of my high school maths teachers each time I use it ;)

Do you find yourself using your lessons from school in unexpected places?  Or does this make me a bit of a geek? :P